
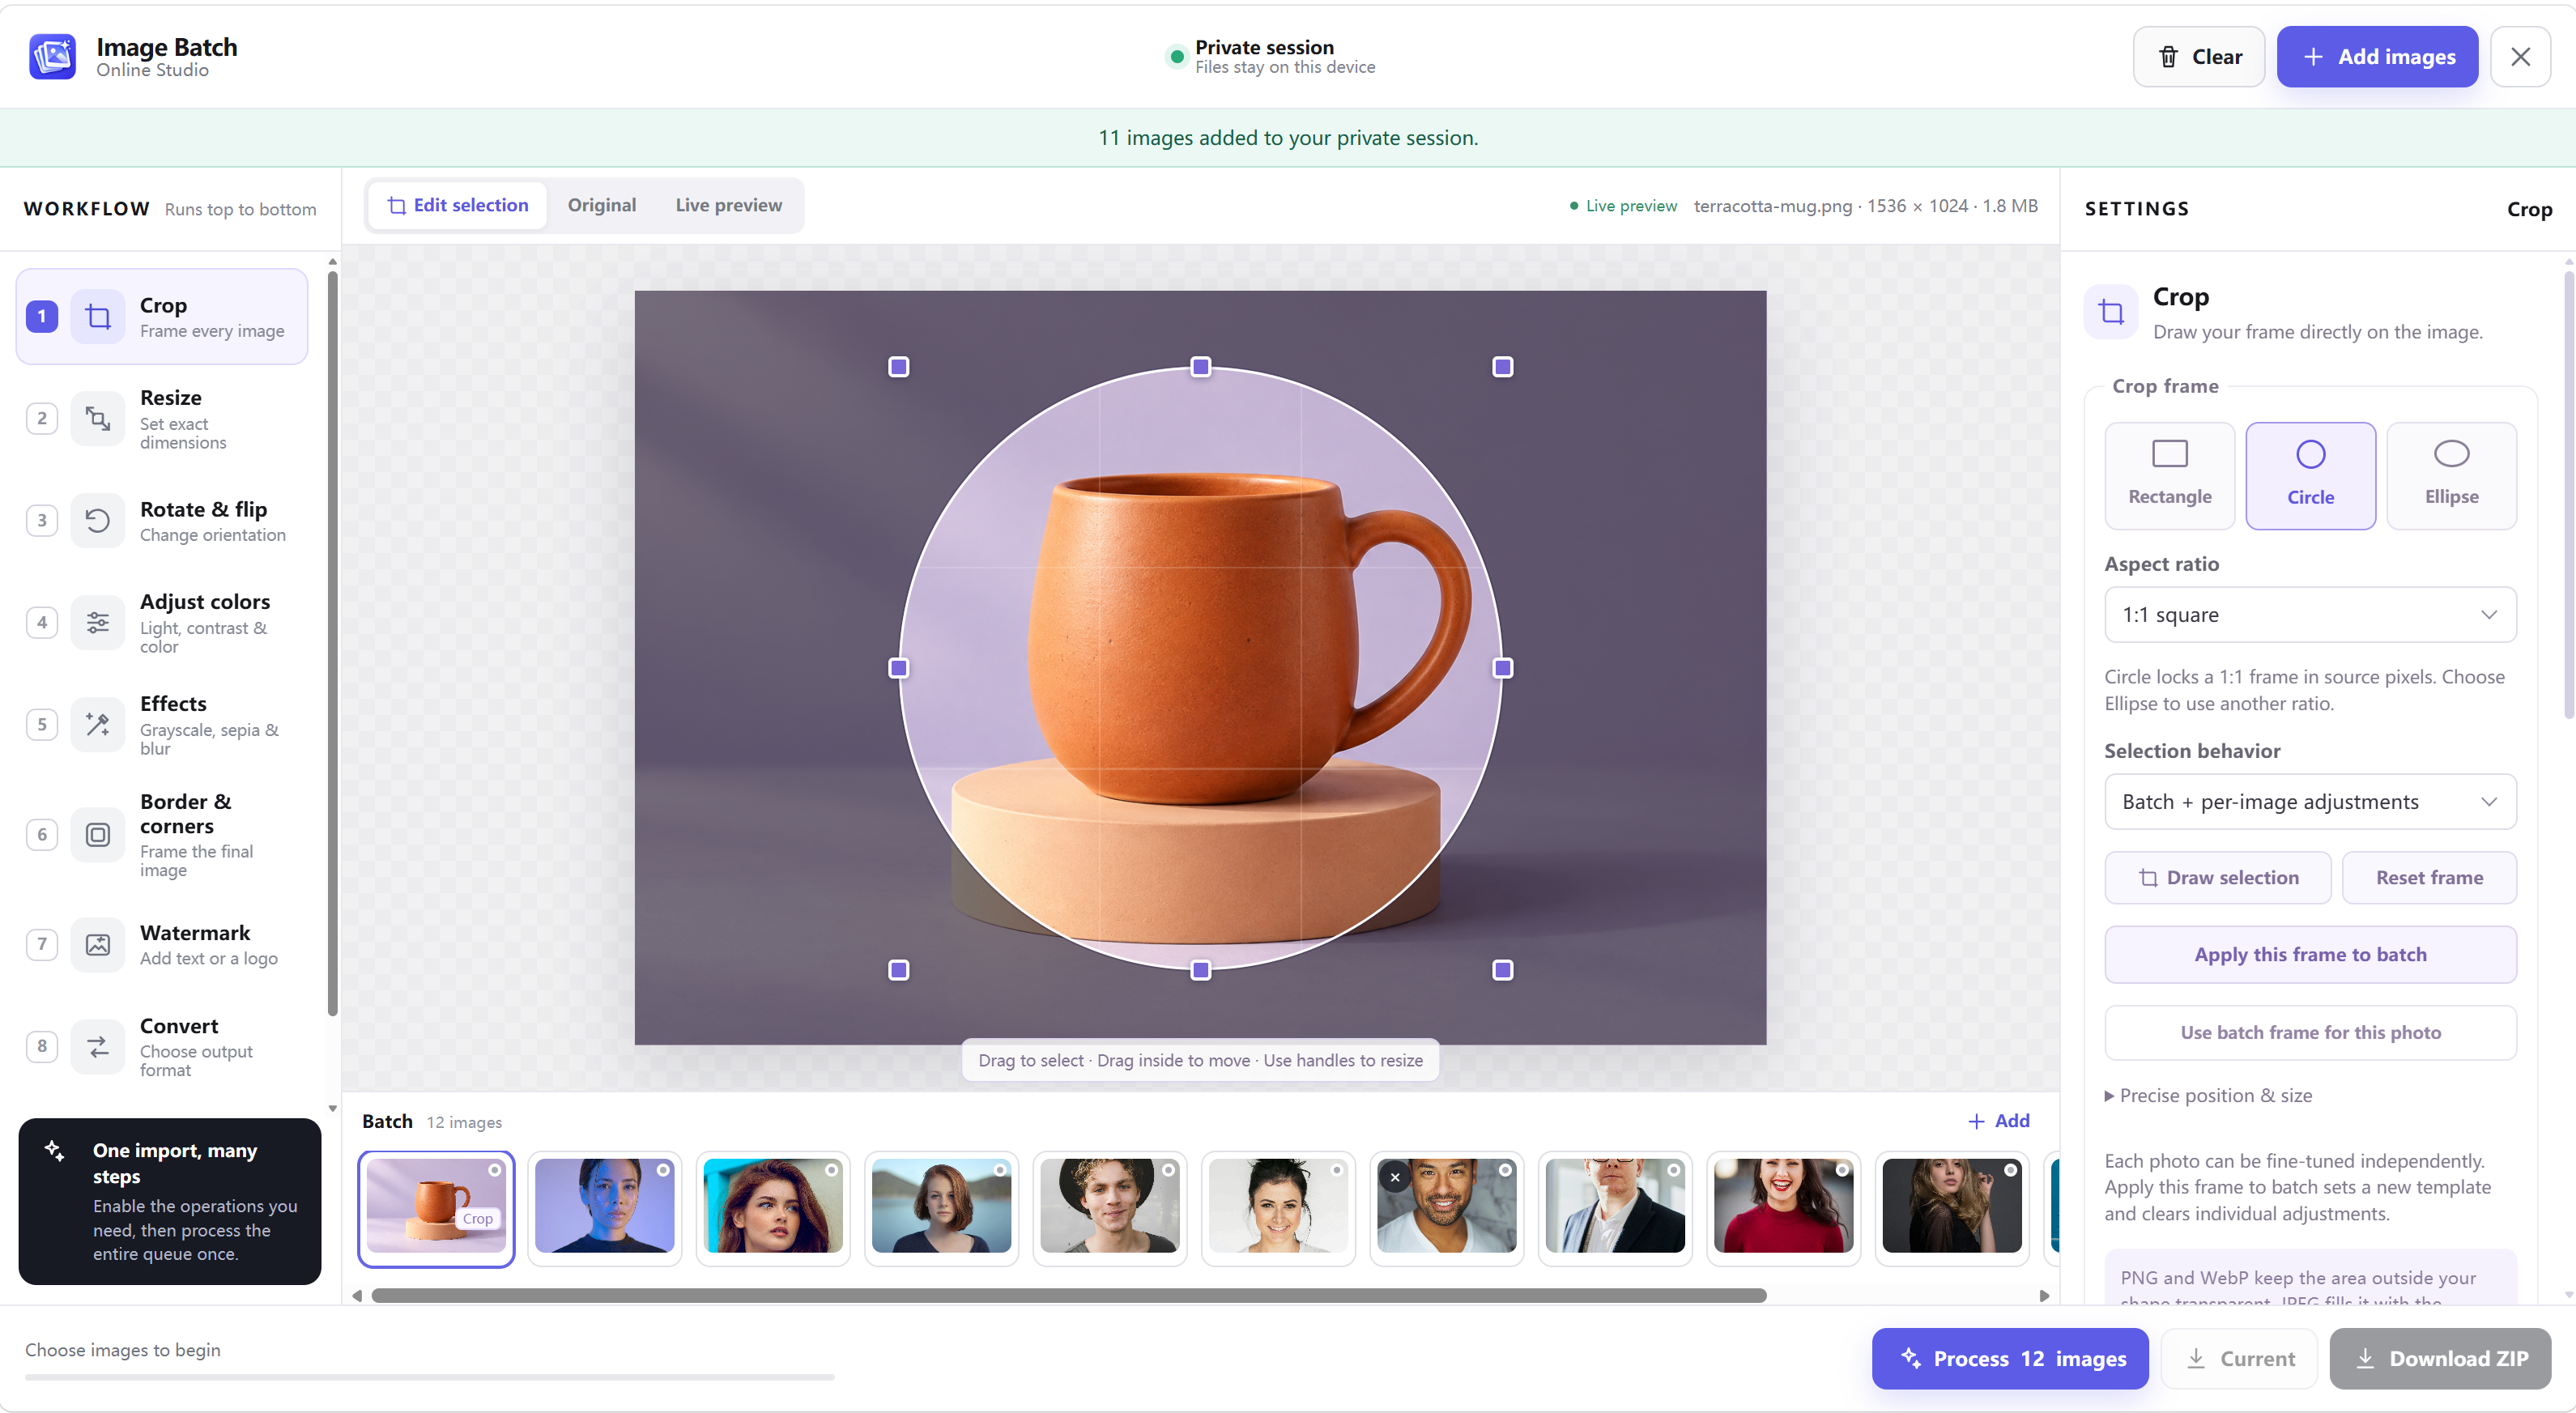
A shared crop is a useful starting point, but a batch rarely puts every subject in the same place. One portrait needs space above the head; another needs the frame shifted left. The practical workflow is to apply a template once, then keep a separate correction for each photo.
Choose the shape and aspect ratio
The online batch crop tool supports three shape choices:
- Rectangle: use a free frame or a fixed ratio for product tiles, landscape banners, and portraits.
- Circle: use a true 1:1 frame in source pixels for round avatars and badges.
- Ellipse: use a freely proportioned oval or select a ratio when you want a wider or taller shape.
A circle on a landscape image does not mean the selection uses equal percentages of its width and height. Those dimensions represent different numbers of pixels. The editor keeps the circular frame square in actual source pixels. Ellipse is the option to use when you want independent width and height.
Draw and refine the first frame
Select Edit selection and draw on the image. Use Draw selection when you want to start a new frame rather than move the existing one. Drag inside the frame to move it and use the eight handles to resize it.
For repeatable framing, choose the aspect ratio before adjusting the composition. The precise position and size section exposes percentages if you need a numerical correction. Check the frame around a face, product edge, or another important detail, rather than centering the surrounding background by habit.
Apply a template before making individual corrections
Keep Batch + per-image adjustments selected. On a representative photo, establish your crop and use Apply this frame to batch. This creates the shared frame for the queue and clears any earlier individual adjustments.
Now select another thumbnail and move or resize that photo’s frame. This correction belongs to that photo. The other images continue to use the batch template or their own existing corrections; you do not need to reposition the complete batch every time.
If one correction should be removed, use Use batch frame for this photo. If all images should move to a new template, use Apply this frame to batch again, understanding that it resets individual work. Finish the shared framing decision before spending time refining twelve separate portraits.
Remember where crop sits in the workflow
The online studio runs Crop before Resize and Rotate. Your crop frame is drawn against the source image, and the selected region is then passed into later steps. If you also need a standard final canvas, set it in Resize after the compositions are correct.
For a store catalog, use the product image resizing workflow to combine a common listing ratio with individual product placement. For avatars, inspect both the circular boundary and the final output dimensions.
Export shapes with the right transparency
The rectangle around a circle or ellipse contains empty pixels outside the shape. PNG and WebP preserve this transparent area. JPEG and the editor’s 24-bit BMP output fill it with an opaque background color.
A checkerboard in the preview indicates transparent pixels, not a pattern that needs to be drawn into your export. Test the downloaded image against a different background to confirm its edges. See the format and transparency checklist if the result appears as a solid square.
Inspect the whole set before downloading
Switch between thumbnails and review a landscape source, a portrait source, and an off-center subject. The live preview shows the selected image only. Process images applies the configured workflow to the queue and prepares the downloads.
Keep the original files. A batch ZIP is a convenient delivery package, but the original compositions remain valuable when you later need another ratio, shape, or output size.